 a journal of interesting technical ideas . . . a journal of interesting technical ideas . . .
I’ve created a new repository for Visio Stencils.
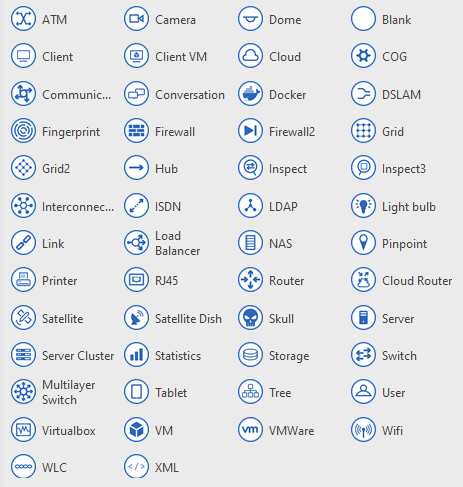
Affinity Blue is a set of abstract network icons set in circles. These are the alternative icons used in the GNS3 project. I like using them in GNS3 because they provide a nice “clean” look that makes diagrams easy to quickly understand. Vendor-specific icons for each type of firewall, for instance, can quickly distract from the function being provided and the flow of traffic. These icons have been given four cardinal connections points.
A second set is called “Brent’s Stencil”. This is a collection of “standard” shapes taken from a variety of online sources - mostly old Cisco drawings. If you like the old Cisco documentation diagrams, these give that same look.
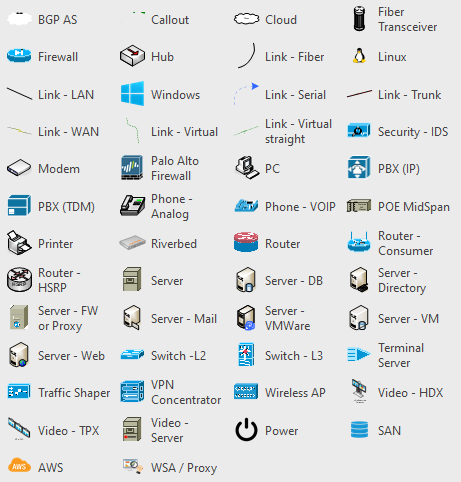 This second stencil has been more heavily customized. Several of the icons have extra connection points (this makes it easier to label lines going to a switch, for instance). The “link” lines have been set so that the text will be at the same angle as the line, which helps to clean up diagrams.
This set is older - I’ve used it for at least a decade. It has some icons that show time has passed like a TDM PBX, analog phone, and ISDN switch. It also doesn’t have much in the way of containers, VMs, or clouds. Still, this collects a variety of useful icons and puts them in one place. I hope it is useful to you.
For those interested in creating their own stencil set, the process is easy.
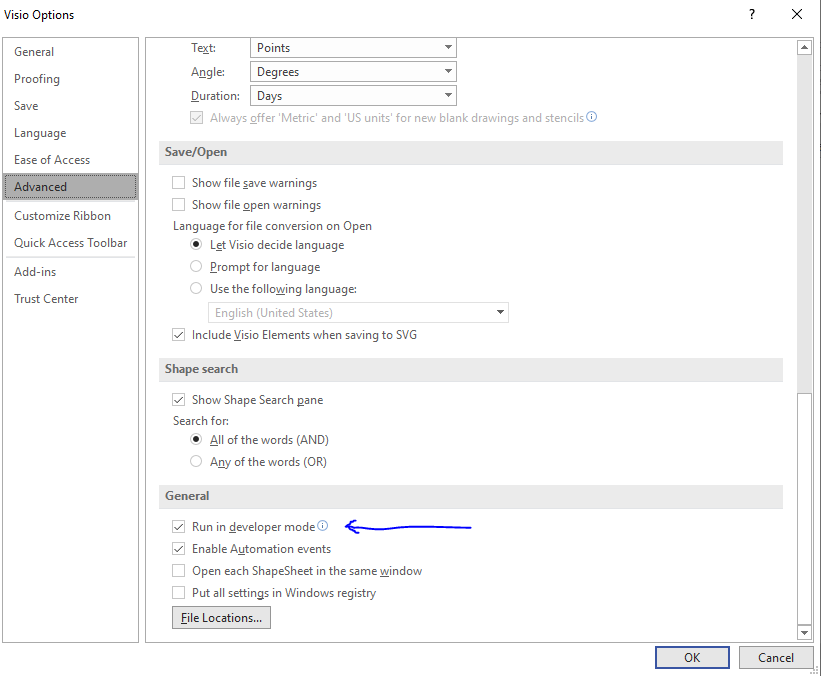 First, in Visio go to File > Options > Advanced and enable Developer Mode. This will allow you to edit the stencil later.
Grab an icon that you want to use and place it in Visio (either import it or just paste it in). is a pretty good place to find icons or images to use, or you can paste them in from other programs. If you’re using an image, make sure to resize the imported image to the size that you’ll want it to be most commonly. Most icons are about a half-inch square or so.
Next, edit the icons properties. Right click the image and open the ShapeSheet (top option). Go to the Connection Points section. If that section doesn’t exist, right click and choose “add section”. You can add lines to the connection point table to make it look the way you want. Each connection point exists on a grid where (0,0) is the bottom left corner and (width,height) is the upper right. Add a connection point to the middle of the right side by putting it at (width,height*.5). Right click the grid to add additional lines as needed.

In “Brent’s Stencil” I added a line which has text that is angled with the line. I did that by opening the ShapeSheet for the line and editing the Text Transform box to set the TxtAngle property to ATAN(Height/Width).
Whether you just clone the repo and use these or want to contribute to the collection, I hope this inspires you to do something cool!